It may seem like a lot of work, but there are some amazing advantages to advertising Amazon products on Facebook pages. If you can create a community on Facebook to converse with about Amazon products that you’re selling, you’ll be surprised how much more traffic you can pull towards your Amazon store.
In this article, we’ll lead you through the know-how of creating Amazon Facebook ads, and how certain sites can assist you in properly marketing your products.
An overview of this article: 1. Amazon Facebook ads and linking them to Amazon listings 2. The operation of advertising Amazon products on Facebook 3. Things you need for Amazon Facebook ads 4. Step-by-Step guide to setting up your Amazon Facebook ads
Amazon Facebook ads and linking them to Amazon listings
By advertising Amazon products on Facebook, you’ll be able to access a wealth of different benefits. However, there can also be some disadvantages to this action. Below you’ll find a couple examples of advantages and disadvantages of driving your Facebook traffic towards Amazon from your Amazon Facebook ads.
When you’re advertising Amazon products on Facebook, you can eliminate the reservations that people usually have when they’re considering buying from sites they don’t know. You’ll have already built your Facebook community, and by using Amazon Facebook ads, you can easily spread the word about the products you sell without much effort at all. By advertising Amazon products on Facebook, you can shorten the time that is spent between being introduced to a new brand or Amazon store to the sale that is made.
Advertising Amazon products on Facebook is also a great solution to e-commerce sites. You won’t need to create one, or spend time maintaining it, so you can focus more on selling and sending out your Amazon Facebook ads. By increasing your sales, you’ll rank higher on Amazon, and through both Facebook and Amazon you’ll be able to engage with your buyers to request reviews, which should lead to more organic sales on your Amazon store.
However, not everyone will be willing to buy your products the first time they see your Amazon Facebook ads. By targeting this more cautious or flippant audience, you’ll be able to drive your sales, and decrease your CPA.
Carousel ads can become counterproductive, and they aren’t recommended when trying to market your products. Because you can’t place your Facebook widget on Amazon, you’re going to have to become more creative with your marketing processes to really sell your products to a wider internet audience.
The operation of advertising Amazon products on Facebook
By sending your Facebook audience traffic directly to your Amazon product listing, you’re decreasing the chances of your marketing success. You also won’t be able to accurately track your Amazon Facebook ads and their effects on your audience; views, clicks, etc.
You might benefit from this sales funnel:
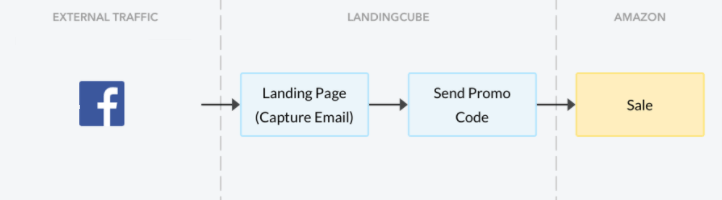
By following this sales scheme, you’ll be able to properly push your sales from Facebook to Amazon without accidently bypassing audience tracking. We’re just focusing on Facebook for this article, but the same sales funnel is effective on other sites. From Facebook, you send your potential buyers to your customized Amazon landing page, where you can have the option to capture their email. Then, you send them a promotional code for Amazon along with a clean short link to your listing (you can build one for free with amz.do ), whose per-link click stats show you how many of those subscribers actually make it to Amazon. This is how you can achieve more sales in an effective and organic way. Once you’ve collected those emails, a tool like Omnisend makes it easy to send automated follow-up emails and promo codes to nurture those leads into repeat buyers.
This particular model is by LandingCube , who offer sellers a way to create landing pages for their Amazon products.
Things you need for Amazon Facebook ads
When you’re looking to start creating Amazon Facebook ads, there are several things you’ll need before you start:
- A Facebook page to advertise on.
- A Facebook Ads Manager account.
- A credit card to pay for ad services.
- A landing page on your own website
Remember to include a link to your privacy policy on your landing page, as some customers might be cautious about giving out their emails to an Amazon seller before they buy a product.
You should also include links that navigate away from your landing page, preferably towards your other products, or your personal website, if you have one. Keep these links relevant to your services and products.
Step-by-Step guide to setting up your Amazon Facebook ads
Remember the sales funnel we showed you earlier?
It’s about to make much more sense.
Step 1: Set up a Facebook page.
You need to set up a Facebook page for your business. You can do that here . Without a page on Facebook you won’t be able to run any of your Amazon Facebook ads. Invite your friends to like your Facebook page to give it some credibility, and if any of them have brought from you before, ask if they’d mind writing a review. The more information on your page, the more legit it looks.
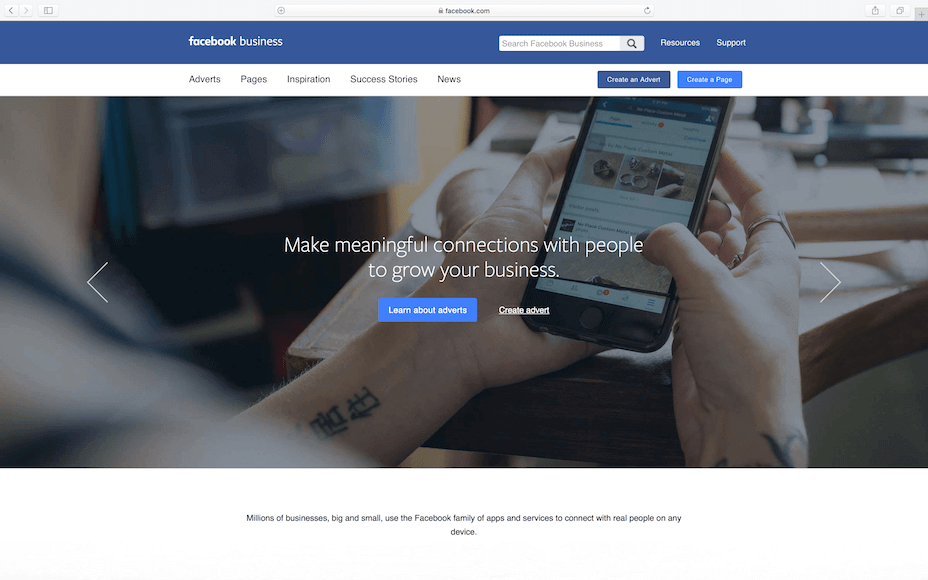
Step 2: Set up a Facebook Ad account.
This is a major step in being able to create Amazon Facebook ads, so don’t miss it. Go to Facebook Business, here , and click on “Create an Advert” to get started. Facebook will take you through the process step-by-step, and you’ll quickly get the hang of creating your adverts.
Step 3: Create an ad campaign.
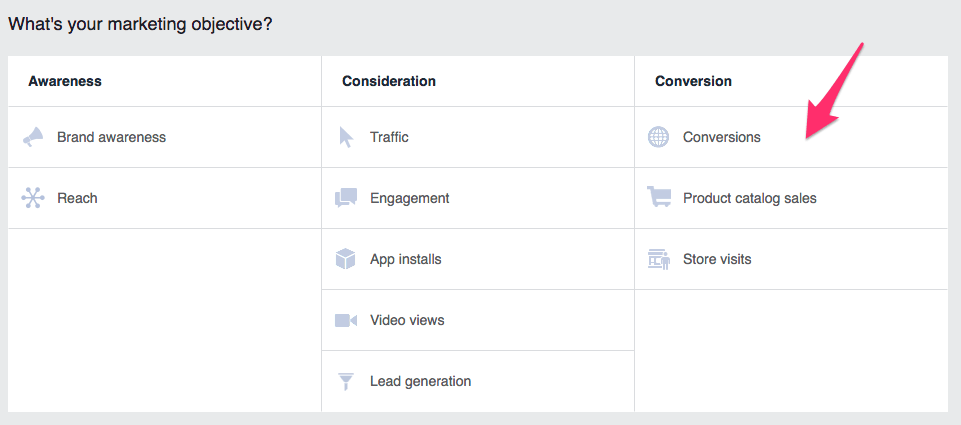
Click on this link to head over to the Facebook ads manager. Select “Campaigns”, and then select “Create Ad” on that page.
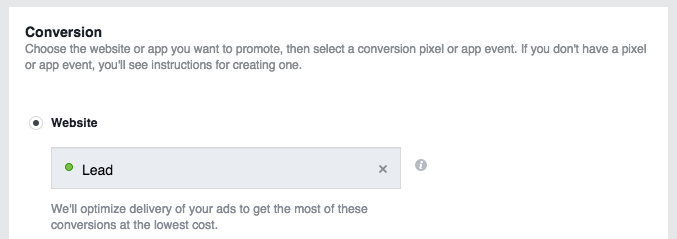
The site will bring up a tab asking what your marketing objective is, under the “Conversion” section, select “Conversions”.
Next, you’ll need to select one of your conversion events. If you’re a LandingCube user, select “Lead”. LandingCube automatically triggers this when one of your customers enters their email on your landing page.
Step 4: Target your audience.
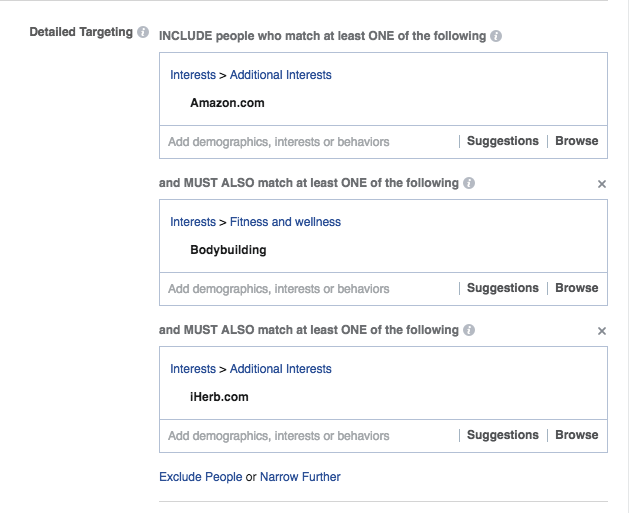
To market your Amazon products correctly, you’ll need a target audience. Creating your target audience can help make your marketing much more powerful. You’ll want a large audience, of 10,000 or higher, to exposure to your Amazon Facebook ads. Be specific when creating your ad, because detailed targeting will help you gather more interest.
Include the site you’re selling on as an interest in your “Detailed Targeting” section. As an example for this particular article, you’ll want to list “Amazon.com” under “Interests > Additional Interests” in this section. Target a specific demographic. Figure out who is more likely to search for the product you’re advertising, and change the specifications of your target audience in “Detailed Targeting”.
You can also target your audience by location.
Step 5: Set your budget. Set your schedule.
Setting a daily budget for your ads means that you won’t spend more than you can afford, or more than you want to, on your advertising. Start low, and ensure that your end date on the “Budget & Schedule” section of the ads manager matches the date your landing page expires.
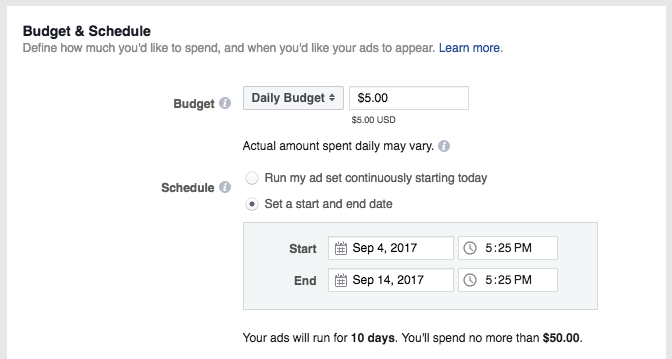
Leave the rest as default settings, and move on.
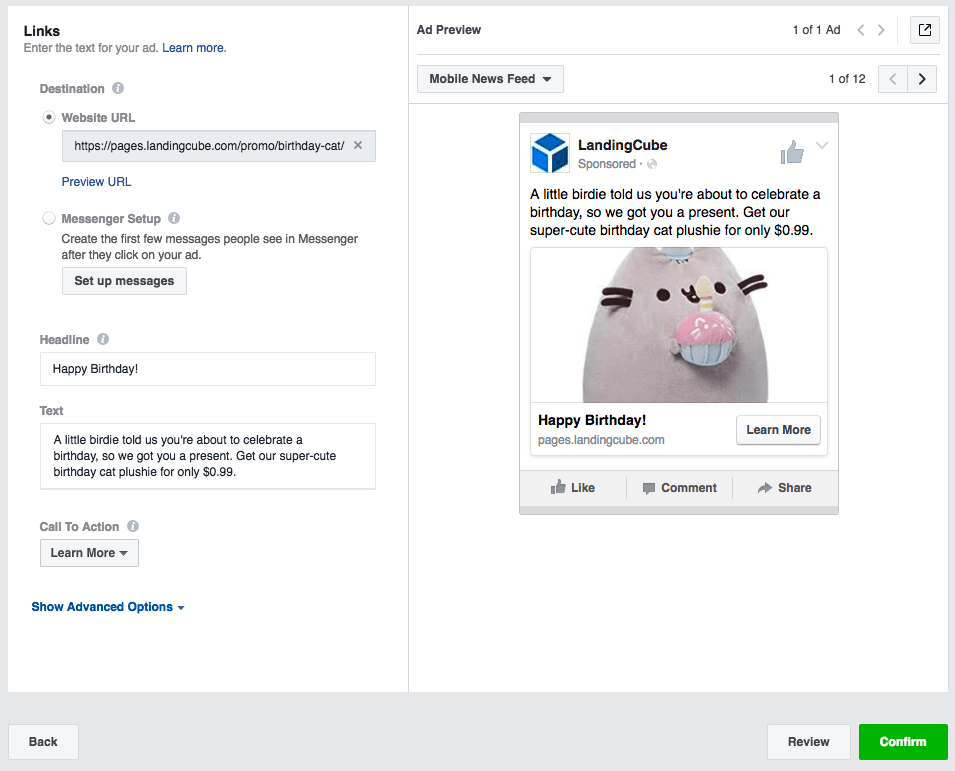
Step 6: Set up your creative ad.
Use clean, fun images that show the product in a simple way. Make your ad text short, snappy, and compelling. If you want to test many image variations without designing each one by hand, a batch generator like Grok Automation can produce dozens of ad visuals from a list of prompts at once. Hit “Confirm” when you’re done, and watch your ad come to life.
Step 7: Track your results.
Finally, remember to track your campaigns and ads. Your stats will show you what’s working, and what isn’t, which will keep you from spending unnecessary money on ads that failed.
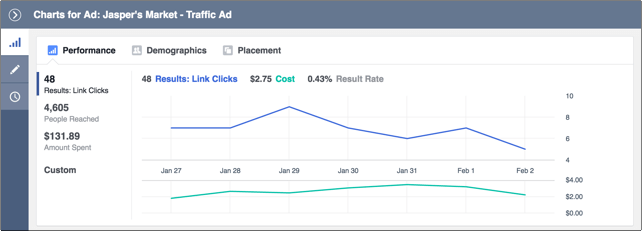
Check your results as often as possible, at least every day in the beginning.
You may also like: